12d Model Administrator – 12d Synergy Data Management Basics – Part 3
This is the third and final article (you made it!) in our series helping you manage your data smarter with 12d Synergy. Join Tim Brooks – a civil designer with 21 years’ experience – as he walks you through easy-to-follow videos on the basics of data management with 12d Synergy.
New to 12d Synergy? Check out our complete training series teaching you everything from The Fundamentals to 12d Synergy’s Managed Folders .
After completing part 3, you’ll be able to easily control 12d Synergy’s administrator features to manage your 12d Model Projects.
This article is designed for 12d Synergy administrators – who manage the backend of a company’s 12d Synergy system. If you’re not an administrator, think of this article as the optional part of the series – but feel free to stick around none the less (the more the merrier!) Alternatively, check out our previous article on managing 12d Model data with 12d Synergy (psst, I heard it’s really good).
Watch: 12d Synergy Training Series – Video 9 – 12d Model Administrator Integration
Managing your 12d Model Project in 12d Synergy Administrator
To begin, open your 12d Synergy Administrator Client.
Now, find the 12d Model Projects settings tab (located down the bottom of the left-hand column) of your Administrator window.
Setting 12d Model Attributes
Attributes are the extra pieces of information associated with your 12d Model Project – for example, the Project Type and Approval Date.
To configure your 12d Model Attributes, go to System Attributes and find the 12d Model Project Attributes tab.
Here, you can add or delete attributes or include features such as Type, Summary, Visibility Constraints or making the attribute Optional. To explore this further, jump to (1:18) in our video.
Creating 12d Model Project Templates
12d Model Projects Templates are like the bases of your pizza – but instead of having a pepperoni or pineapple (yes, we went there) topping, you have Set-Up files or extra Sub-Folders. (2:59)
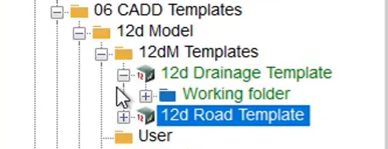
To add a new Template, simply find the 12d Model Projects Template tab (towards the top of your display) from within your 12d Model Project administrator settings.
Here, you can edit the name of your Template, browse for it in your 12d Synergy Client, and add naming rules.
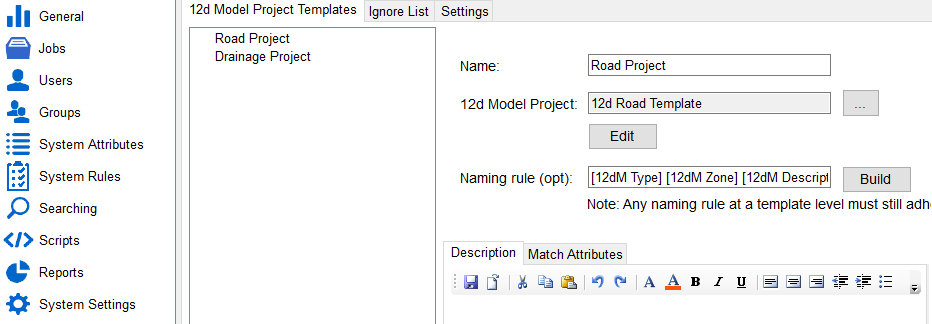
You can add attributes to your template by selecting the Match Attribute tab. To explore this further, jump to (6:31) in our video.
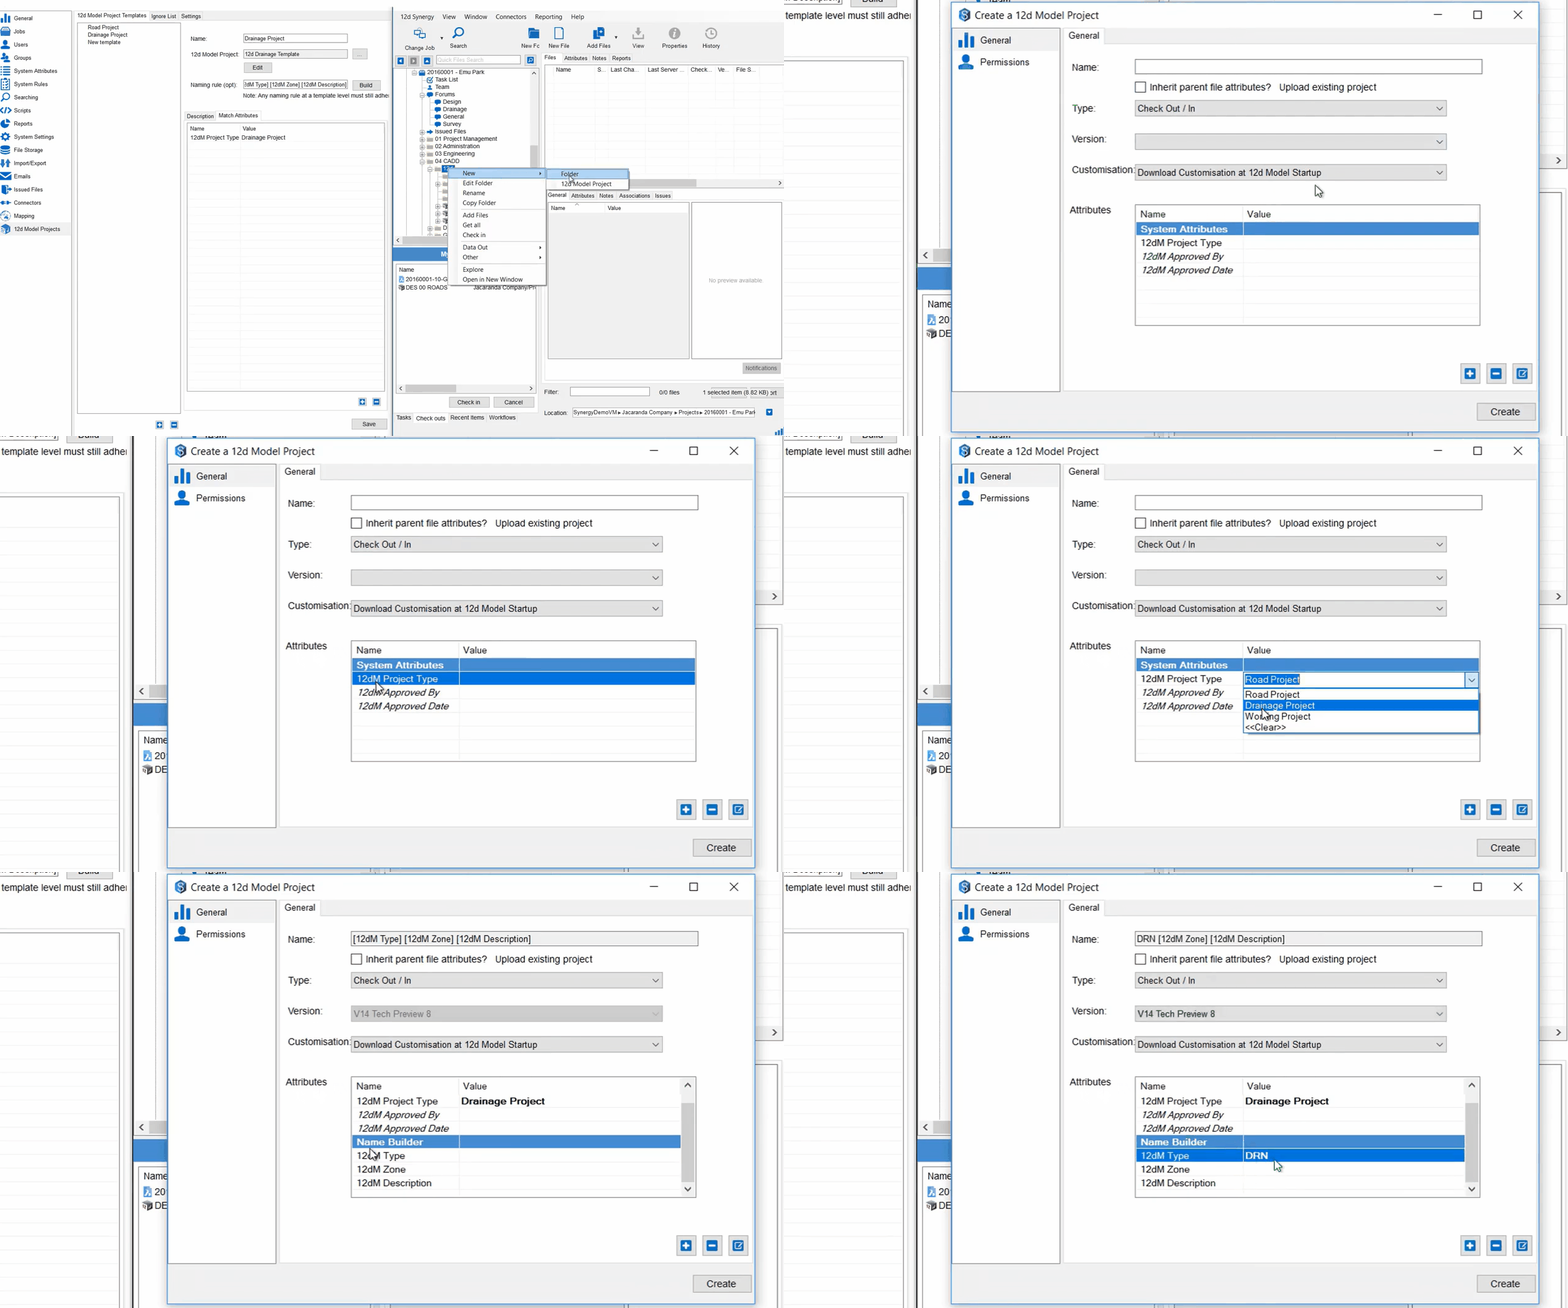
To create a new 12d Model Project with your Template, simply right click on a folder in your Client, hover over New and select 12d Model Project. Navigate down to the Attributes sections and select your template from a drop-down menu. Easy!
Managing your Ignore List
12d Model Projects operate as Managed Folders – only transferring the files that have been changed and not the full project. The whole folder of files is treated as a single entity, protecting your project from data corruption .
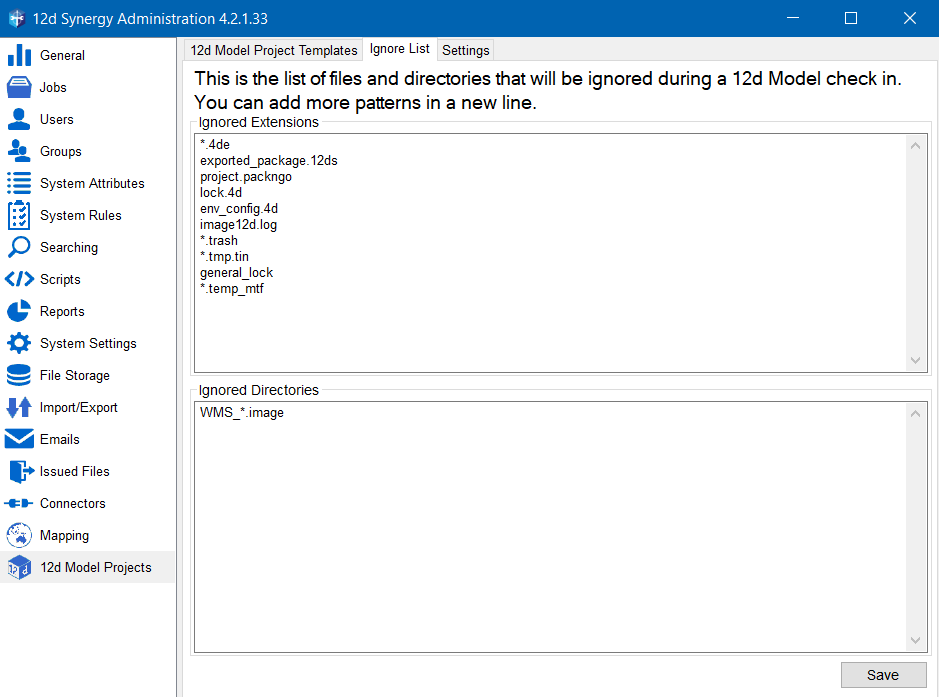
This is particularly useful to avoid uploading unnecessary items from your 12d Model Project when checking back in – such as log files. 12d Synergy comes built in with some standard extensions and directories to ignore – for example, “*.trash”.
The Ignore List allows you to further customise this, stopping certain files types within a folder of files being uploaded by adding them to the Ignored Extensions or Directories.
To add more, simply type in the extensions you wish to ignore and then click Save in the bottom right hand corner.
Controlling your 12d Model Project Settings
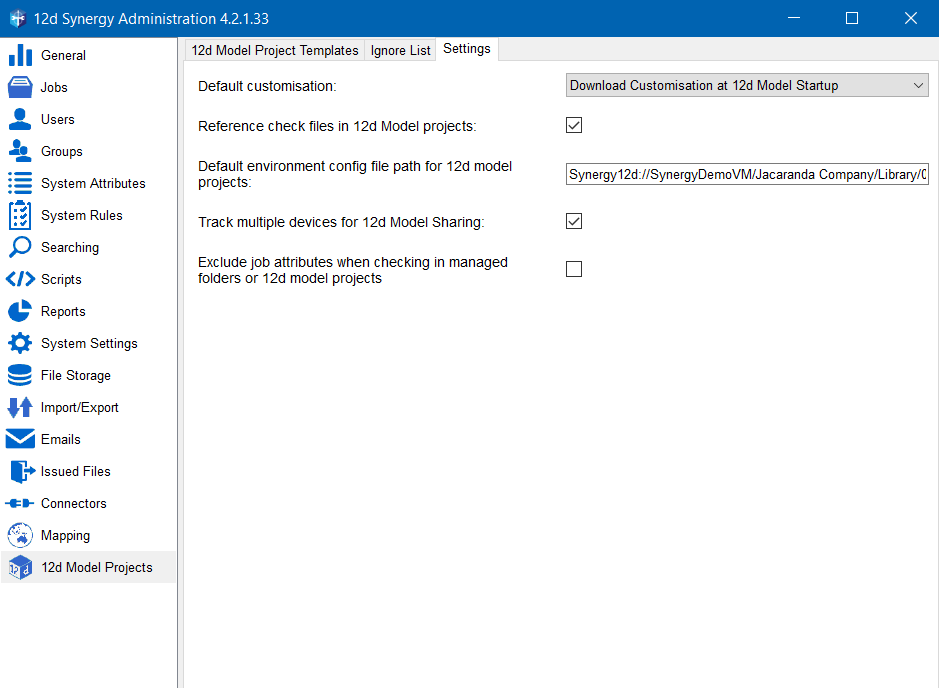
The Settings tab (9:49) is where all your 12d Model settings are located (we call a spade a spade). This includes:
• Default customisation: To explore these further, jump to 9:57 in our video.
• Reference check files in 12d Model Projects: This performs a check for references such as shared models and Tins when 12d Model Projects are brought into 12d Synergy. This can be turned on or off by your system administrator.
• Default environment config file path for 12d Model Projects: This helps reduce browsing to find your env_config.4d file so you can simply just copy and paste the path and filename into the search bar.
• Track multiple devices for 12d Model sharing: For users on two devices, who may have a computer in the office and a tablet in the field. 12d Synergy tracks which device has your 12d Model Projects checked out.
• Exclude job attributes when checking in Managed Folders or 12d Model projects: Defaulted to off, so if you have a file attribute on your folder, those file attributes don’t get applied to all the files in your Managed Folder and don’t ask to be updated.
You can now manage your 12d Model Project through 12d Synergy Administrator mode like a true boss. Boom.
Also, you’ve done it! You have completed the 12d Synergy Data Management Basics series. You can take your first steps to managing your data smarter. Double Boom.
Faster Data Transfer: Woods Case Study
Learn how Woods synchronised their 12d Model Projects with 12d Synergy to enhance efficient collaboration.

Author